

 German
  English
  Arabic
  French
  Spanish
  Turkish
  Italian
  Russian
  Persian
  Bengali
  Hebrew
  Persian (Afghanistan)
  Scottish Gaelic
  Panjabi
  Croatian
  Slovenian
  Greek
Greek  Afrikaans
  Czech
Czech  Korean
  Japanese
  Portuguese












ICC Profiles for UV Printing: How to Match Brand Colors on Dark Materials
A customer sends you a logo with a specific corporate blue. It looks correct on the monitor and may even print acceptably on white acrylic. But when the same artwork is printed on black acrylic, brushed aluminum or colored PVC, the result suddenly looks darker, less saturated or noticeably different from the approved brand color.
This is one of the most common color-management problems in UV printing. Many operators respond by adjusting CMYK values manually, increasing ink density or trying another ICC profile for UV printing. Sometimes the result improves, but the next material produces another color shift.
The reason is simple: accurate UV color is not controlled by one ICC file alone. It depends on the entire printing condition, including the printer, ink, substrate, white underbase, resolution, pass mode, ink limits, curing and color-management settings.
A more reliable workflow is:
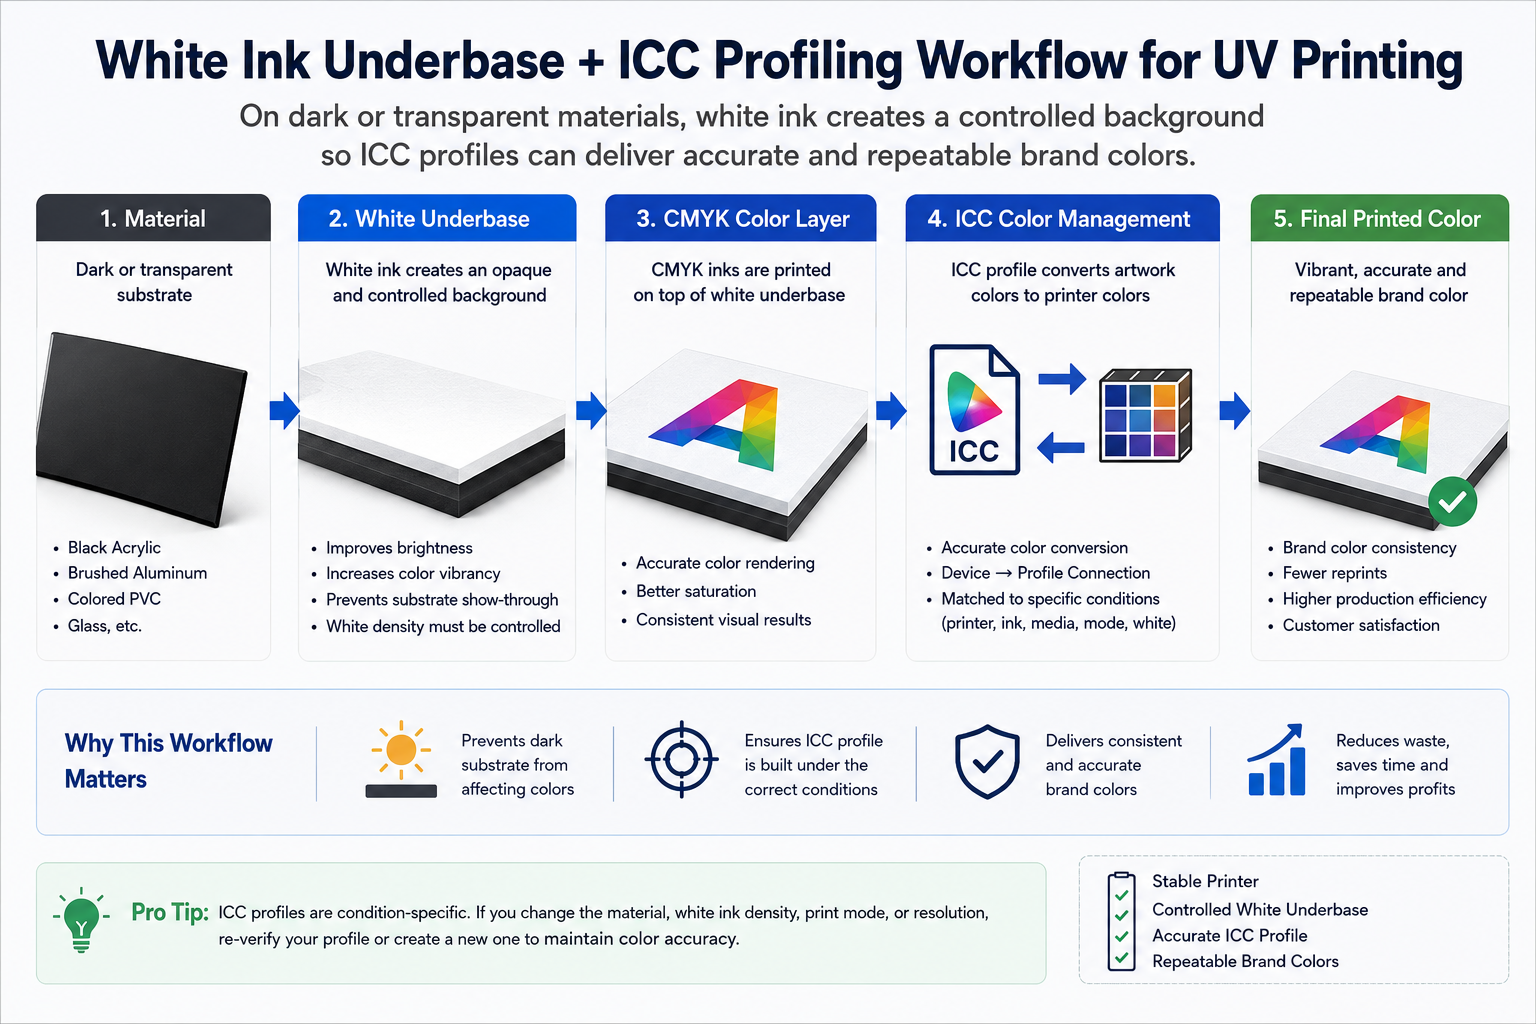
Stable Printer → Controlled White Underbase → Ink Limits → Linearization → ICC Profile → Spot Color Optimization → Verification
This guide explains how that workflow works, why dark materials require special attention and how UV print shops can reproduce important brand colors more consistently without wasting material on endless trial-and-error adjustments.
Why Does the Same Color Look Different on Different Materials?
UV printing differs from conventional printing on white paper because the substrate itself can become part of the final visual result.
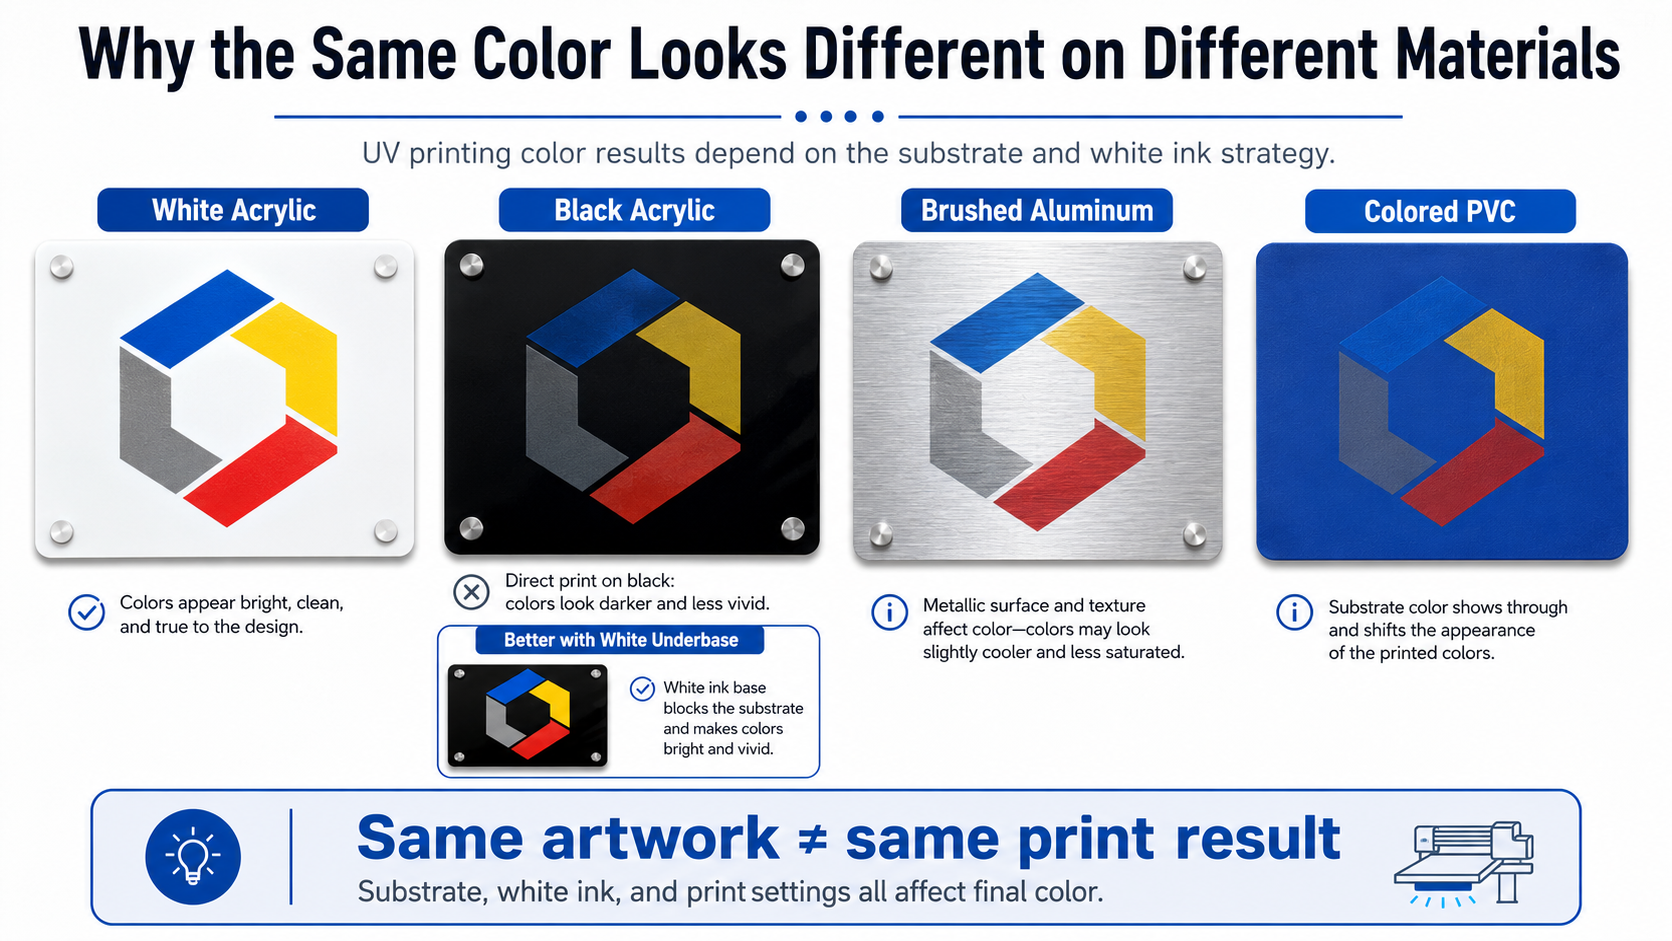
If you print the same CMYK artwork on white acrylic, black acrylic, brushed aluminum and colored PVC, you should not automatically expect the same appearance. The surface color, opacity, gloss, texture and reflectivity of each material affect how the printed ink is perceived.
The Substrate Is Part of the Final Color
White Acrylic
White acrylic provides a relatively neutral background. Because the substrate is already light and opaque, CMYK ink can often produce bright colors without requiring a white underbase. This makes it easier to achieve predictable color reproduction.
Black Acrylic
Black acrylic creates a completely different printing condition. UV CMYK inks are not designed to behave like an infinitely thick opaque coating. When color is printed directly onto a dark surface, the substrate influences the visual result. Bright colors may become dull, dark areas may lose separation, and corporate colors may shift significantly.
For many applications, a white ink underbase is therefore required before the CMYK layer.
Brushed Aluminum
Aluminum introduces another variable: reflectivity. Printing directly on metallic material can intentionally preserve a metallic appearance, which may be desirable for decorative products. However, if the goal is to reproduce an opaque corporate color, a controlled white layer may be necessary.
Colored PVC
Colored PVC also changes the apparent output. A red, blue or gray substrate can influence transparent or semi-opaque portions of the printed image unless the RIP workflow creates an appropriate white underbase.
The first important rule is therefore:
The same artwork does not necessarily require the same print recipe on every substrate.
Why Monitor Color and Printed Color Are Different
Another common mistake is comparing a printed sample directly with a computer monitor and expecting them to appear identical.
A monitor creates color by emitting light using RGB values. A printed object is viewed through reflected light. The printer also has a limited reproducible color gamut determined by its ink set, substrate and printing condition.
This means some bright screen colors cannot be reproduced exactly with CMYK UV inks. The monitor itself may also be too bright, incorrectly calibrated or using a different color space from the artwork.
For critical color evaluation, use properly managed source files, controlled viewing conditions and physical color measurements whenever possible.
What Is an ICC Profile in UV Printing?
An ICC profile describes how a device reproduces color under a defined condition. In a UV printing workflow, an output profile can help convert the colors in the source artwork into printer values that better match the capabilities of the printer, ink and material combination.
Source Profiles and Output Profiles
A digital file may contain a source profile such as sRGB, Adobe RGB or a CMYK profile. The RIP uses color-management information to interpret those source values and convert them into the output space of the printer.
The output condition may include:
- UV printer model;
- printhead and ink configuration;
- ink chemistry;
- substrate;
- resolution;
- pass mode;
- ink limits;
- printing direction;
- white ink strategy.
This is why an ICC profile for UV printing should be treated as part of a defined production condition rather than as a universal color-correction file.
What an ICC Profile Can Do
A properly created profile can help:
- improve overall color accuracy;
- control neutral balance;
- make tonal transitions more predictable;
- improve repeatability;
- reduce unnecessary manual color correction;
- provide a better starting point for spot-color matching.
What an ICC Profile Cannot Fix
An ICC profile cannot compensate for an unstable printer.
If your production condition changes significantly after profiling, the output may no longer match the profile accurately. A profile cannot reliably correct problems such as:
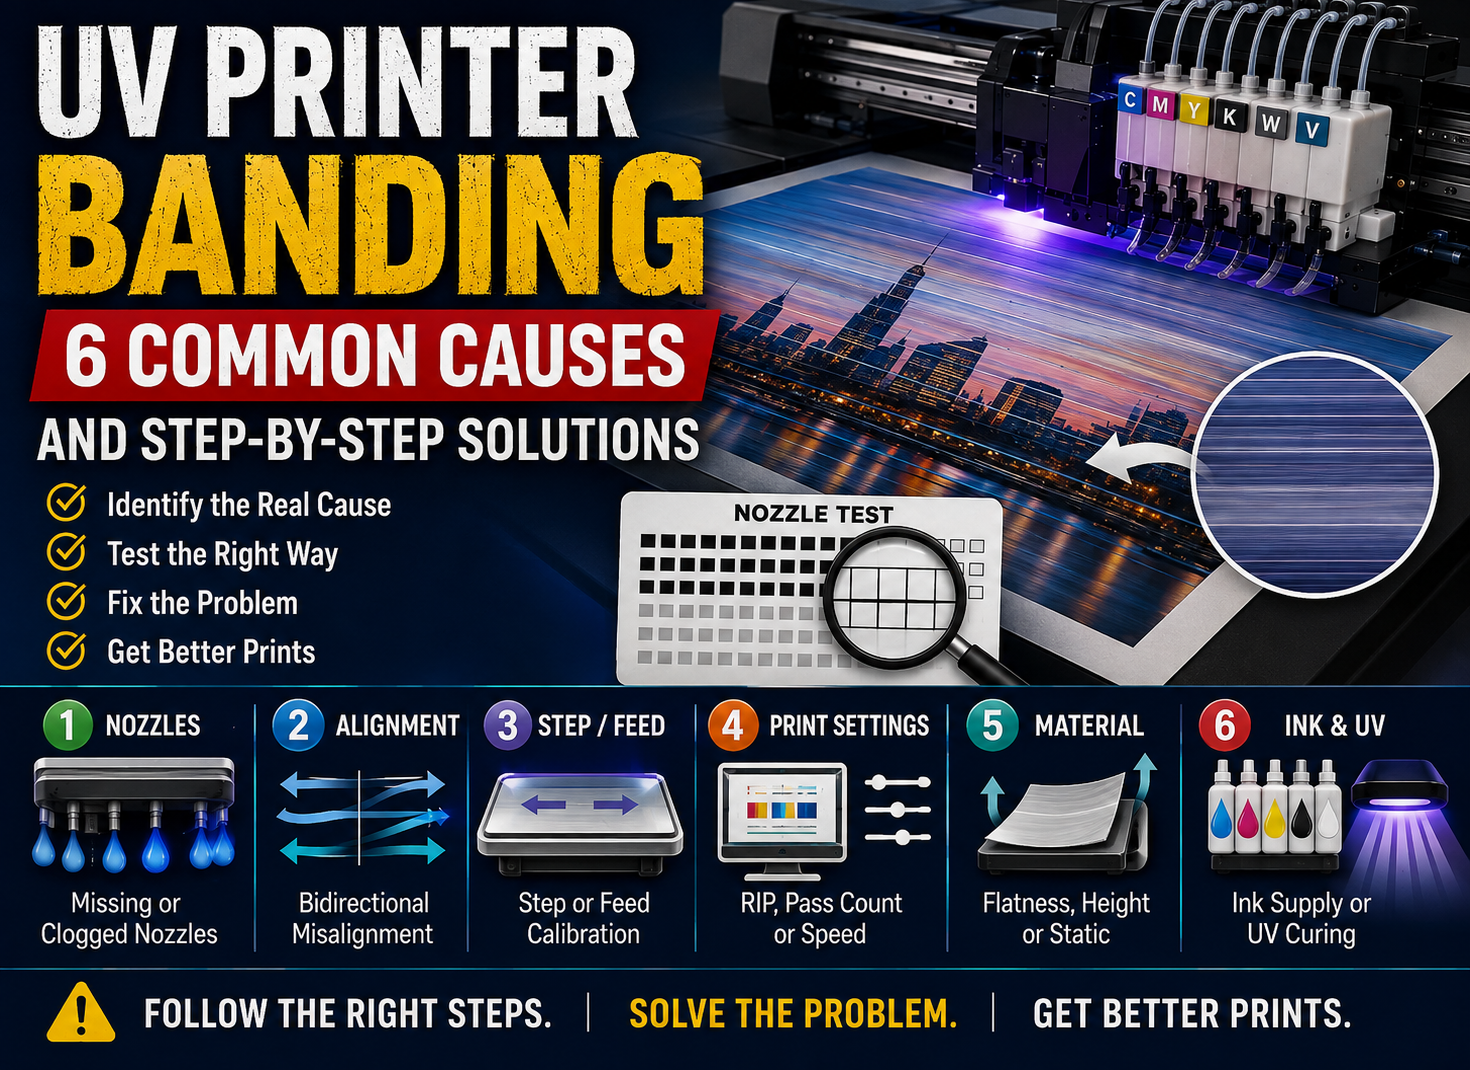
- missing or clogged nozzles;
- poor printhead alignment;
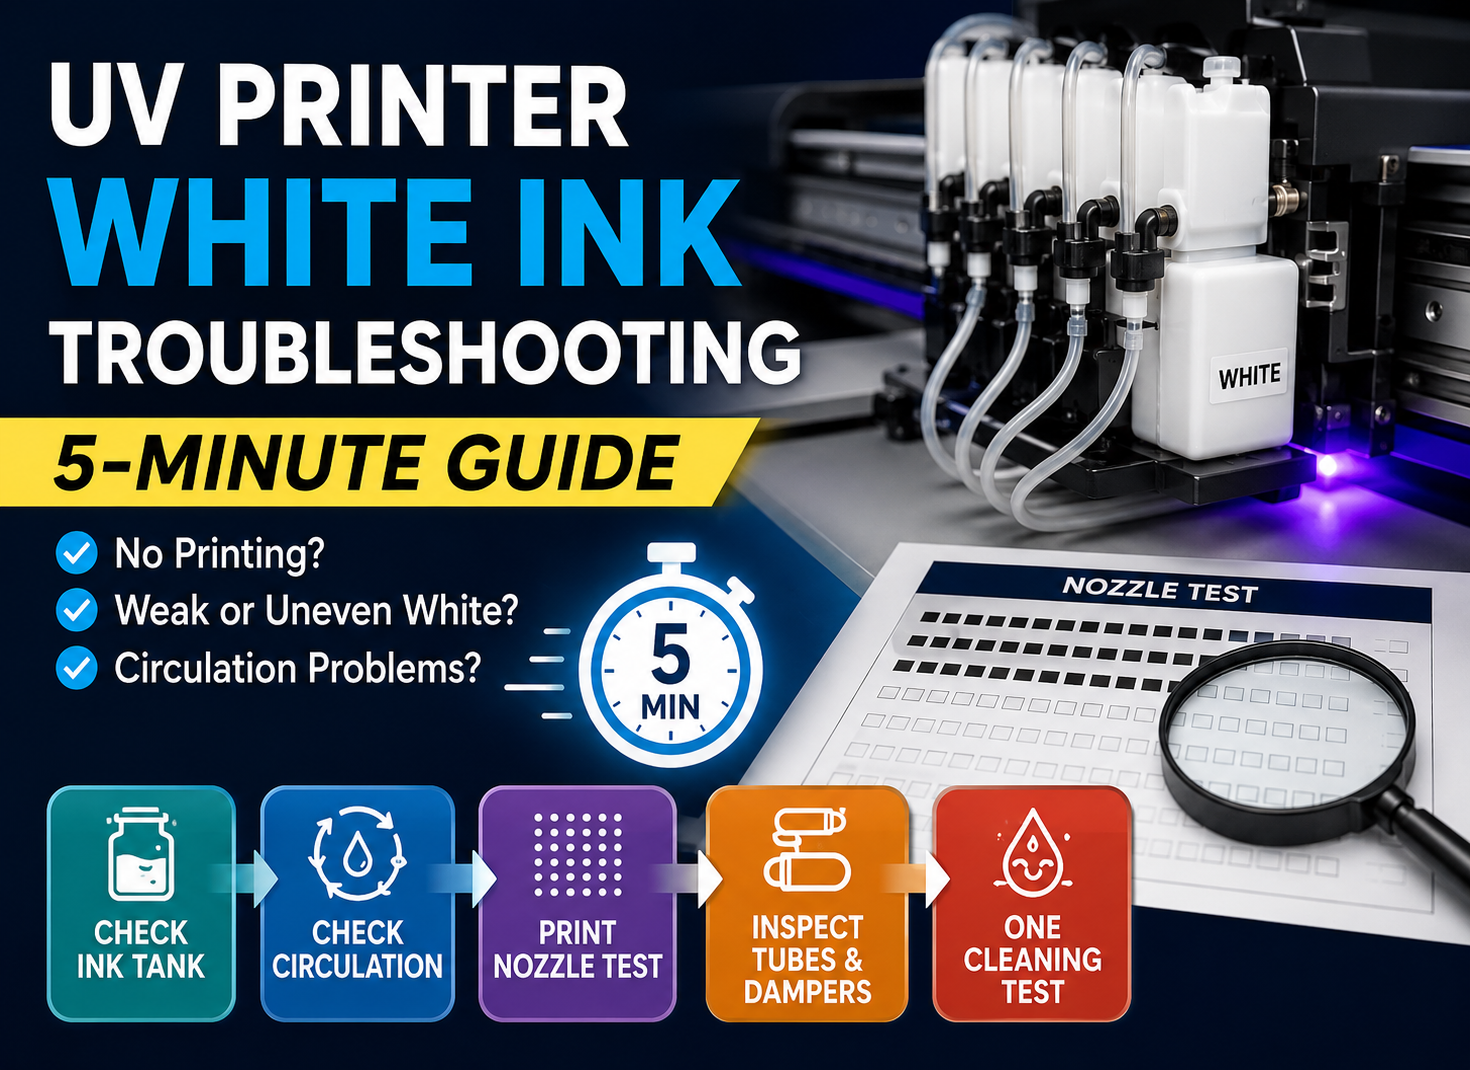
- unstable or sedimented white ink;
- incorrect curing;
- changed ink chemistry;
- different substrate surface properties;
- incorrect print mode;
- inconsistent white ink density.
This leads to one of the most important rules in professional UV color management:
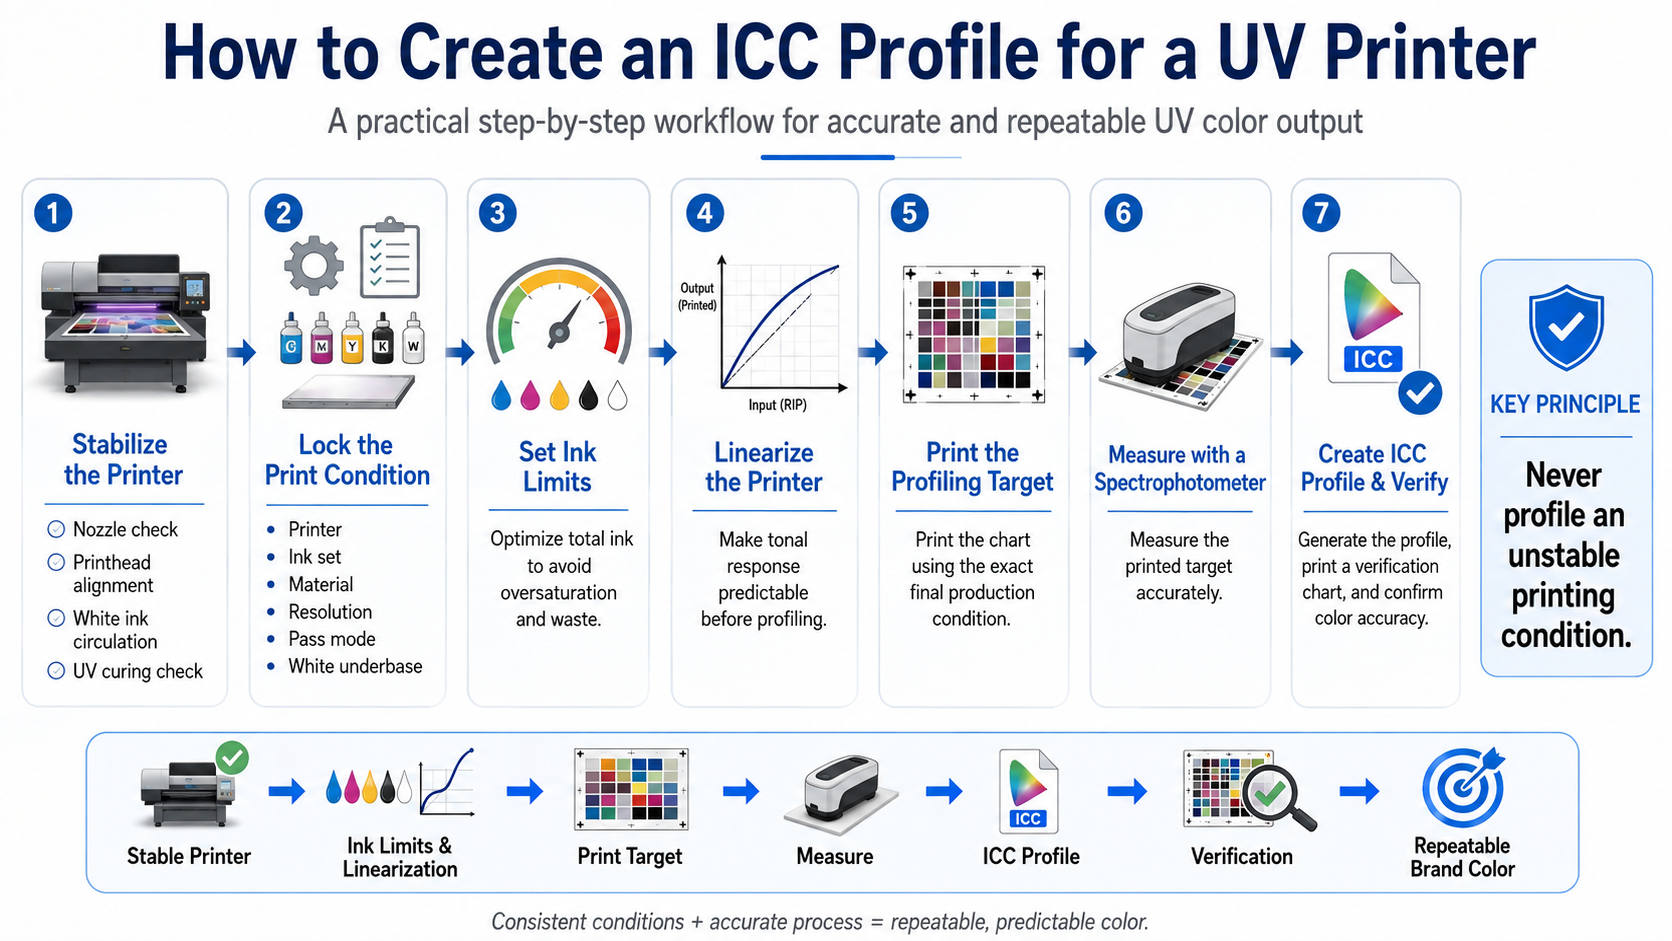
Never profile an unstable printing condition.
Why White Ink Must Be Controlled Before ICC Profiling
White ink is one of the biggest differences between conventional CMYK workflows and UV printing on dark or transparent materials.
What Happens Without a White Underbase?
Imagine printing a bright yellow logo directly onto black acrylic. The black substrate influences the appearance of the yellow ink, making it much darker and less vivid than the same color printed on white acrylic.
Adding more yellow ink does not necessarily solve the problem because the issue is not simply insufficient CMYK density. The background itself is different.
White Underbase Creates a Controlled Background
A more suitable workflow is:
Dark Material → White Underbase → CMYK Color
The white layer creates a lighter and more controlled surface for the CMYK layer. This can greatly improve color saturation, contrast and repeatability.
However, the white layer itself becomes part of the color condition.
White Ink Density Matters
If one production preset uses a relatively light white layer and another uses a much denser white layer, the CMYK colors printed above them may not look identical.
This is especially important when creating or validating an ICC profile. If you build a profile using one white ink condition and later significantly change the white density, the visual relationship between the profile and the final output may change.
For repeat production, define and save the white-ink settings rather than adjusting them randomly from job to job.
Choke and Spread
White underbase alignment also affects edge quality. If the white layer extends beyond the color artwork, a visible white edge may appear. If the white layer is too small, dark substrate may show around the edge.
RIP workflows may provide tools such as:
- choke;
- spread;
- underbase generation;
- spot-white control;
- layer-order settings.
These controls are especially important when printing fine text, small logos or detailed graphics on dark materials.
How to Build an ICC Profile for a UV Printer: Step by Step
Creating a profile should be treated as a controlled production process. The quality of the final ICC profile depends heavily on the stability of the data used to create it.
Step 1: Stabilize the Printer
Start with the machine, not the software.
Before printing any profiling charts:
- perform a nozzle check;
- confirm printhead alignment;
- check white ink circulation;
- confirm ink supply stability;
- verify UV curing performance;
- make sure the printer is operating normally.
If the nozzle pattern changes between profiling and production, the resulting color may also change.
If you are experiencing white-ink instability, review our guide on
UV Printer White Ink Circulation Troubleshooting
before creating a new color profile.
Step 2: Lock the Production Condition
Decide which production condition the profile is intended to represent.
Record:
- printer model;
- ink set;
- material name and supplier;
- resolution;
- pass mode;
- unidirectional or bidirectional printing;
- white ink settings;
- UV curing settings where applicable.
A useful principle is:
One profile should correspond to one clearly defined printing condition.
This does not mean every tiny production variation requires a new profile. It means the condition used for profiling should be clear enough that operators can reproduce it later.
Step 3: Set the Ink Limits
More ink does not automatically produce better color.
Excessive ink can create several problems:
- oversaturated shadows;
- poor tonal separation;
- unnecessary ink consumption;
- surface texture problems;
- curing difficulties;
- longer production time.
The goal is to identify an appropriate ink level for the material and print mode before profiling.
Step 4: Linearize the Printer
Linearization helps make the printer’s tonal response more controlled and predictable.
In simple terms, the goal is to create a stable relationship between requested tonal values and actual printed output so that the profiling process has a reliable foundation.
This step is important because ICC profiling works best when the printer behaves consistently before the profile is created.
Step 5: Print the Profiling Target
The profiling chart must be printed under the exact production condition you intend to characterize.
Use the same:
- printer;
- ink;
- material;
- resolution;
- pass setting;
- white underbase strategy;
- other relevant RIP settings.
Do not print the target using a fast temporary setting and then expect the resulting profile to work perfectly with a different high-quality production mode.
Step 6: Measure the Profiling Target
After the target is printed and properly cured, measure it using a suitable spectrophotometer and profiling workflow.
Visual evaluation is still important for the final product, but creating a repeatable ICC profile requires measurement data rather than relying only on human eyesight.
Step 7: Generate the ICC Profile
The profiling software uses the measured target data to model how the printer reproduces color under that specific condition.
The resulting profile should be named clearly.
For example:
SN1390_BlackAcrylic_8Pass_White100_2026.icc
A clear naming system helps operators understand which profile belongs to which production condition.
Step 8: Print a Verification Chart
Do not stop when the software says the profile has been created.
Print a verification target or a representative production test containing:
- neutral grays;
- skin-tone or photographic areas where relevant;
- saturated colors;
- gradients;
- important corporate colors;
- fine text and detail.
Measure or visually evaluate the result under controlled lighting. If the profile does not produce acceptable production output, investigate the cause before releasing it to all operators.
ICC Profile vs Spot Color: Which Should You Use for Brand Colors?
An ICC profile improves the overall color behavior of the printing condition, but that does not mean every critical brand color will automatically match perfectly.
This distinction is important when printing corporate logos, safety graphics, retail displays or branded packaging.
ICC Profiles Optimize the Overall Color Space
The profile helps the RIP reproduce the overall range of colors as accurately and consistently as the printer, ink and material allow.
However, some requested colors may fall outside the printable gamut. Others may technically be within gamut but still require closer control because the customer expects a specific visual reference.
Critical Brand Colors May Need Spot-Color Optimization
If a customer provides an approved physical sample, Pantone reference or measured LAB value, use it as a dedicated target rather than relying only on visual comparison with a monitor.
A practical spot-color workflow may include:
- identify the target color;
- print a controlled swatch chart around the target;
- measure or compare the candidates;
- select the closest acceptable result;
- save the optimized recipe in the RIP;
- record the material and print mode used.
Why LAB Values Are Useful
RGB values are highly dependent on the display and source color space. LAB values are more useful when color needs to be evaluated by measurement because they represent color independently of a specific monitor or printer.
For important production work, ask the customer for one of the following where possible:
- a LAB target;
- a recognized spot-color reference;
- an approved physical sample.
A screenshot sent through email or messaging software is usually a poor color standard.
Create a Spot-Color Swatch
When the first result is close but not acceptable, print several controlled variations around the target instead of manually changing values at random.
For example, generate samples with small controlled changes in lightness, chroma or CMYK output. Measure each sample, choose the best result and save it for future repeat orders.
This turns color matching from guesswork into a reproducible production process.
Practical Example: One Logo Printed on Four Materials
Consider a customer who wants the same blue company logo printed on four different products.
White Acrylic
The logo may be printed with CMYK only if the white acrylic provides a sufficiently neutral background. The validated ICC profile and print preset can often deliver a good starting point for the target color.
Black Acrylic
The same CMYK values printed directly on black acrylic will normally appear much darker. A white underbase is needed for an opaque brand-color appearance.
Now the white density becomes part of the production condition.
Brushed Aluminum
There are two possible design goals.
Without white ink: some metallic reflectivity can remain visible through the color, creating a decorative metallic effect.
With white ink: the printed area becomes more opaque and can move closer to the appearance of the same brand color printed on a neutral surface.
Neither approach is automatically correct. The correct choice depends on the customer’s intended appearance.
Colored PVC
On colored PVC, a white underbase may again be required. Material-specific verification is important because the surface finish and background color can influence the result.
The key lesson is:
Same artwork does not mean same production recipe.
If your business frequently prints acrylic, see our detailed guide to
UV Printing on Acrylic
.
For metal applications, see:
UV Printing on Metal
.
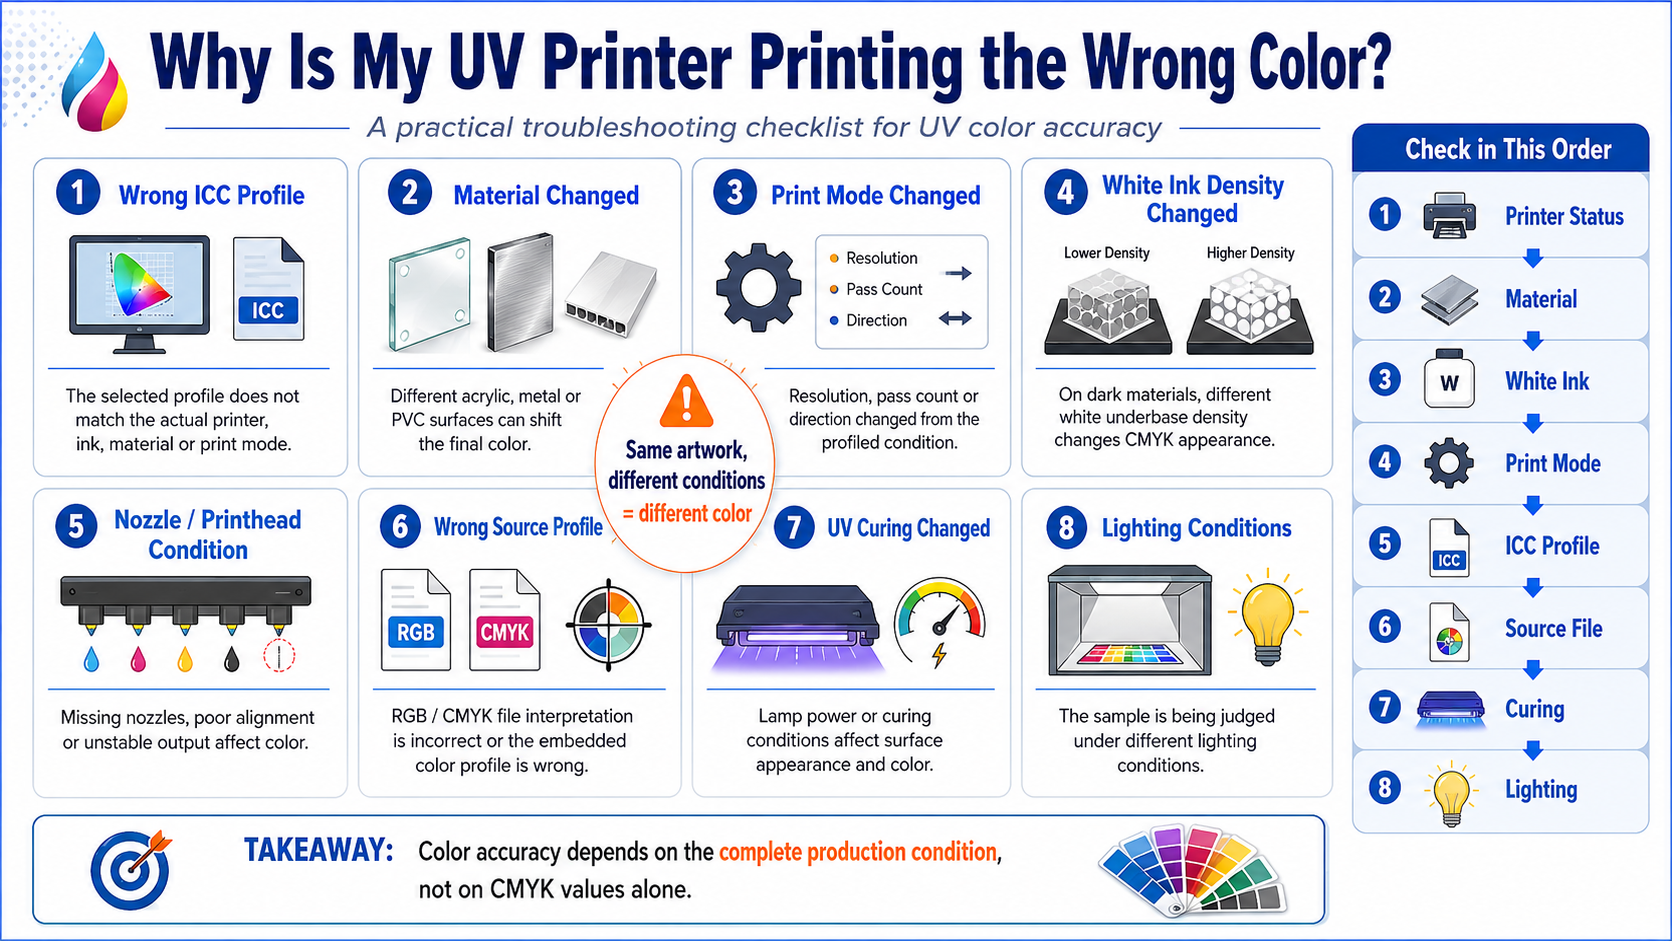
Why Is My UV Printer Still Printing the Wrong Color?
Even after creating an ICC profile, color problems can return if the actual production condition changes.
1. Wrong ICC Profile Selected
This is one of the simplest causes. Operators may accidentally select a profile created for another material or print mode.
2. The Material Changed
Two substrates described as “white acrylic” may have different surface chemistry, whiteness, gloss or opacity. A significant material change can affect the final color.
3. The Print Mode Changed
Changing resolution, pass count or printing direction may change ink deposition and color behavior.
If the profile was created at one production mode, verify performance before applying it to another.
4. White Ink Density Changed
On dark materials, a different white underbase can change the apparent CMYK color printed above it.
5. Nozzle Condition Changed
Missing nozzles reduce effective ink output and may create both visible banding and color shifts.
See our guide on
How to Extend the Life of Ricoh and Epson UV Printheads
for preventive maintenance practices.
6. The Source Profile Is Wrong or Missing
If artwork is created in one color space but interpreted as another, the color conversion can be incorrect before the printer even begins producing the job.
7. UV Curing Conditions Changed
Changes in UV curing can affect surface appearance, gloss and visual perception. When troubleshooting color, do not evaluate only CMYK values.
8. You Are Comparing Under Different Lighting
A sample viewed under daylight may appear different under warm indoor lighting. This effect can become especially noticeable with certain saturated or neutral colors.
For critical approval work, define the lighting condition used for color evaluation.
When Should You Rebuild or Recalibrate an ICC Profile?
You do not need to rebuild every ICC profile simply because a small visual difference appears. First determine whether the printer can be returned to its original calibrated condition.
Consider Reprofiling When:
- the ink chemistry changes significantly;
- a new substrate behaves differently from the previous material;
- the printhead configuration changes;
- a major production mode changes;
- white-underbase strategy changes substantially;
- major hardware replacement changes printer behavior;
- normal recalibration cannot restore acceptable output.
Recalibration May Be Enough When:
If the machine has only drifted slightly but the fundamental printing condition remains the same, recalibration or relinearization may restore the printer closer to the state used when the original profile was created.
This is usually more efficient than rebuilding profiles unnecessarily.
The practical principle is:
Rebuild the profile when the production condition has meaningfully changed; recalibrate when the goal is to restore the original condition.
A Practical UV Color Management Checklist
Before Profiling
- ✓ Nozzle check is complete and stable
- ✓ Printhead alignment is correct
- ✓ Ink condition is stable
- ✓ Material is confirmed
- ✓ White ink density is fixed
- ✓ Resolution and pass mode are fixed
- ✓ Ink limits are optimized
- ✓ UV curing condition is confirmed
After Profiling
- ✓ Verification chart has been printed
- ✓ Critical brand colors have been checked
- ✓ Customer reference has been compared where required
- ✓ RIP preset has been saved
- ✓ ICC profile has a clear name
- ✓ Production settings have been documented
Final Takeaway: Color Accuracy Is a Workflow, Not a File
The biggest mistake in UV color management is treating an ICC profile as a universal correction file that can solve every color problem.
Reliable color begins before the ICC profile is created.
The printer must be stable. The material must be defined. White ink density must be controlled. Resolution, pass mode and ink limits must be fixed. Only then can the ICC profile accurately describe the production condition.
For important corporate colors, an additional spot-color optimization and verification process may still be necessary.
The complete workflow is:
Stable Printer
↓
Controlled White Underbase
↓
Ink Limits & Linearization
↓
ICC Profile
↓
Spot Color Optimization
↓
Verification
↓
Repeatable Brand Color
When each step is controlled, UV color matching becomes much more predictable—and repeat orders become easier to reproduce without wasting time, ink and material.
Häufig gestellte Fragen
What is an ICC profile for UV printing?
An ICC profile for UV printing describes the color behavior of a defined printer, ink, material and print-mode combination. A RIP can use the profile to convert source colors into output values that better match the capabilities of that production condition.
Do I need a different ICC profile for every UV printing material?
Not necessarily for every individual product, but significantly different substrates and production conditions should be profiled or at least verified separately. If the material, ink behavior, white underbase or print mode changes enough to affect color reproduction, a dedicated profile or preset may be appropriate.
Can an ICC profile make a UV printer match Pantone colors exactly?
Not always. The result depends on the printer’s available color gamut, ink set, substrate, white ink condition and measurement tolerance. Important brand colors may require additional spot-color optimization after the general ICC workflow is established.
Why do colors look darker on black acrylic?
Black acrylic changes the background behind the CMYK inks. Without an adequate white underbase, bright colors can become darker and less saturated. Printing a controlled white layer first creates a more suitable background for the CMYK image.
Does white ink affect UV color accuracy?
Yes. On dark and transparent materials, the white underbase changes the background against which the CMYK layer is viewed. If white density changes significantly, the apparent color of the CMYK layer can also change.
Why did my UV printer color change after replacing ink or material?
An ICC profile describes a particular production condition. If the ink chemistry or substrate characteristics change significantly, the original profile may no longer describe the new condition accurately. Recalibration, verification or reprofiling may be required.
Need More Consistent Color from Your UV Printer?
If your UV printer produces different colors across acrylic, metal, PVC or other substrates, do not begin by randomly changing CMYK values.
Start by reviewing the complete printing condition:
- printer and printhead status;
- ink configuration;
- material;
- white underbase;
- resolution and pass mode;
- ICC profile;
- spot-color requirements;
- verification method.
If you need help evaluating a UV printing workflow, provide your printer model, printhead configuration, RIP software, ink setup, material and target application. A controlled workflow is usually far more effective than repeated trial-and-error color correction.
Previous in the Workflow & RIP Mastery Series:
PhotoPRINT One vs CalderaRIP for UV Printing: 8 Key Differences Beginners Should Know
Next in the Workflow & RIP Mastery Series:
Variable Data Printing for UV Printers: Batch Images, QR Codes and Barcodes Without Manual Editing