Introduction
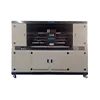
In the world of digital printing, the UV printer has emerged as a game – changer, enabling high – quality, durable prints on a wide variety of materials. At the heart of this remarkable technology lies the UV printer nozzle, a component as crucial as the engine in a car.
The UV printer nozzle is responsible for precisely depositing tiny droplets of UV – curable ink onto the printing substrate. The accuracy and consistency of these ink deposits directly determine the quality of the final print. A well – functioning nozzle can produce sharp text, vivid colors, and smooth gradients, making it ideal for applications ranging from signage and packaging to fine art reproductions. In terms of efficiency, a properly maintained nozzle ensures continuous operation, reducing downtime and increasing productivity.
However, just like any precision – engineered component, the UV printer nozzle is vulnerable to wear and tear, clogging, and other issues that can degrade its performance. This is where nozzle maintenance comes into play. Regular and proper maintenance is not just a good practice; it is essential for prolonging the lifespan of the nozzle, maintaining optimal print quality, and ultimately, for the success of any printing business that relies on UV printers. In the following sections, we will explore in detail the various aspects of UV printer nozzle maintenance.
Common Problems Caused by Poor Nozzle Maintenance
1. Printing Stripes
One of the most visible issues resulting from improper nozzle maintenance is the appearance of printing stripes. When the nozzles are not clean or are partially clogged, the ink is not evenly distributed onto the substrate. This leads to vertical or horizontal lines on the printed output. For example, in a large – format signage print, these stripes can be highly conspicuous, making the signage look unprofessional and reducing its advertising effectiveness. In a product packaging print, stripes can make the brand look less appealing, potentially affecting consumer perception. Printing stripes not only degrade the aesthetic quality of the print but can also render the printed material unusable in some cases, such as for high – end product labels or fine – art reproductions.
2. Color Deviation
Nozzle problems can also cause significant color deviation. Each nozzle in a UV printer is responsible for depositing a specific color of ink. If some nozzles are malfunctioning due to lack of maintenance, the proportion of colors in the final print will be incorrect. For instance, a print that is supposed to have a rich, warm – toned red may appear orange – red if the magenta – dispensing nozzles are not working properly. This color deviation can be a major problem, especially in industries where color accuracy is crucial, like the fashion industry for fabric prints, the graphic design industry for brand – color – consistent marketing materials, and the packaging industry for maintaining brand – specific color identities.
3. Nozzle Clogging
Nozzle clogging is perhaps the most common and troublesome issue caused by poor maintenance. Over time, if the nozzles are not regularly cleaned and properly maintained, ink residues can build up inside them. This build – up can gradually block the tiny openings through which the ink is ejected. When a nozzle is completely clogged, it will stop dispensing ink altogether, resulting in blank areas on the printed image. In a multi – color print, this can create a patchy and incomplete look. Even partial clogging can lead to inconsistent ink flow, which, as mentioned before, causes printing stripes and color deviation. Clogged nozzles often require time – consuming and sometimes costly unclogging procedures, and in severe cases, the nozzle may need to be replaced, leading to increased operational costs and downtime for the printing business.
Daily Maintenance Steps
Cleaning the Nozzle Exterior
Regularly cleaning the exterior of the UV printer nozzle is crucial for maintaining its performance. For this task, you should use a soft, lint – free cloth. Avoid using rough materials that could scratch the nozzle surface. As for the cleaning agent, a specialized UV printer nozzle cleaning solution is highly recommended. These solutions are formulated to effectively dissolve ink residues without causing damage to the nozzle.
The cleaning frequency should be at least once a day. Before starting the cleaning process, make sure the printer is turned off and has cooled down to prevent any potential safety hazards. Moisten the lint – free cloth slightly with the cleaning solution. Gently wipe the nozzle surface in a slow and controlled motion, starting from the top and moving downwards. Be careful not to apply too much pressure, as this could misalign the nozzle or cause internal damage. Pay special attention to the areas around the ink ejection holes, as this is where ink residues are most likely to accumulate. After cleaning, use a dry part of the cloth to remove any remaining moisture or cleaning solution from the nozzle.
Checking Ink Levels and Quality
Regularly checking the ink levels and quality is an essential part of daily nozzle maintenance. Monitoring the ink levels ensures that the printer doesn’t run out of ink during a print job, which could lead to incomplete prints and potential nozzle damage due to dry – firing. Most modern UV printers have built – in ink level indicators, either on the printer’s control panel or through the printer management software. Check these indicators at the beginning of each workday.
In addition to the ink level, the quality of the ink is also crucial. Over time, ink can degrade, especially if it is exposed to high temperatures, humidity, or prolonged storage. Degraded ink may have a different viscosity, which can cause nozzle clogging or inconsistent ink flow. To check the ink quality, look for signs such as discoloration, sedimentation, or a change in the ink’s smell. If the ink appears darker or lighter than usual, or if there are visible particles at the bottom of the ink cartridge, it may be a sign that the ink has deteriorated. Another way to test the ink quality is to perform a small test print. If the print shows unusual patterns, streaks, or color deviations, the ink quality may be the culprit. If you suspect that the ink has gone bad, it is best to replace it with a fresh batch to ensure optimal nozzle performance.
Weekly Maintenance Focus
Conducting a Nozzle Test
Performing a nozzle test on a weekly basis is a fundamental step in assessing the health of your UV printer nozzle. Most UV printers come equipped with a built – in nozzle test function, which can usually be accessed through the printer’s control panel or the dedicated printer software.
To conduct a nozzle test, first, make sure the printer is turned on and in a ready state. In the printer software, navigate to the maintenance or utility section, where you will find the option for the nozzle test. Select this option and start the test. The printer will then print a test pattern, typically consisting of a series of thin lines for each color channel. Each line represents the proper functioning of a group of nozzles.
Once the test pattern is printed, carefully examine it. A perfect test pattern should show continuous, unbroken lines of uniform thickness for each color. If there are missing lines, gaps, or irregularities in the lines, it indicates that there may be issues with the corresponding nozzles. For example, a missing line in the cyan color channel suggests that some of the cyan – dispensing nozzles are not working correctly, possibly due to clogging or a malfunctioning ink supply. Based on the test results, you can then decide whether further maintenance actions, such as cleaning or unclogging the nozzles, are required.
Flushing the Ink Lines
Flushing the ink lines is an important weekly maintenance task that helps to remove any accumulated impurities, air bubbles, or dried – up ink residues in the ink delivery system. This process ensures a smooth and consistent ink flow to the nozzles.
Before starting the ink line flushing, gather the necessary materials, including a sufficient amount of the appropriate ink flush solution. Different UV printers may require specific flush solutions, so it’s crucial to use the one recommended by the printer manufacturer.
The first step is to turn off the printer and disconnect it from the power source to ensure safety. Locate the ink lines that connect the ink cartridges to the printhead. Some printers may have quick – disconnect fittings, while others may require the use of tools to remove the lines carefully. Once the lines are disconnected, attach a syringe filled with the flush solution to the end of the ink line that connects to the printhead.
Slowly and steadily inject the flush solution into the ink line. Be careful not to inject too forcefully, as this could cause damage to the delicate components of the ink delivery system. As you inject the solution, you should see any impurities, air bubbles, or old ink being pushed out of the other end of the ink line. Continue flushing until the solution coming out of the line is clear.
After flushing, reconnect the ink lines to the printhead and the ink cartridges. Before starting the printer again, it’s a good idea to perform a few nozzle cleaning cycles to ensure that any remaining flush solution is removed from the nozzles. This step is important because if flush solution remains in the nozzles, it could potentially affect the print quality or cause nozzle damage when the printer is used with ink again.
Monthly Deep – Maintenance
Removing and Soaking the Nozzle
Monthly deep – maintenance of the UV printer nozzle involves a more thorough cleaning process, starting with removing and soaking the nozzle. First, turn off the printer and unplug it from the power source to ensure safety. Consult the printer’s user manual to identify the correct way to remove the printhead containing the nozzles. Different printer models may have slightly different removal mechanisms, but generally, you need to carefully release any locking mechanisms or connectors that hold the printhead in place.
Once the printhead is removed, prepare a container that is large enough to hold the printhead with the nozzles submerged. Fill the container with a specialized UV printer nozzle cleaning solution. This solution is designed to break down dried – ink residues, which can be extremely stubborn and difficult to remove with regular cleaning methods. The ratio of the cleaning solution to water (if dilution is required) should strictly follow the manufacturer’s instructions.
Submerge the nozzles in the cleaning solution. The soaking time is typically between 2 – 4 hours. However, this can also vary depending on the degree of nozzle clogging and the type of ink used. For example, if the printer has been used frequently with high – viscosity inks, or if there have been long periods of non – use with ink remaining in the nozzles, a longer soaking time may be necessary. After the soaking period, gently agitate the printhead in the solution to help dislodge any remaining ink particles. Then, use a soft brush (such as a toothbrush with soft bristles) to carefully clean the nozzle surface, being careful not to damage the delicate ink – ejection holes.
Calibrating the Printer
Calibrating the printer is an essential part of monthly maintenance as it ensures that the nozzle is in the correct position and that the ink is being deposited accurately. Printer calibration helps to maintain consistent print quality, correct for any mechanical wear or misalignment that may have occurred over time, and ensures that colors are reproduced accurately.
The calibration process usually begins by accessing the printer’s calibration settings in the printer management software. Some printers may also have a calibration option on the physical control panel. In the software, you will typically find options for nozzle alignment, ink density adjustment, and color calibration.
For nozzle alignment, the printer will print a series of test patterns. These patterns are designed to show the position of each nozzle relative to the others. After printing the patterns, you will be asked to examine them and select the option in the software that best represents how the patterns look. The software will then adjust the position of the nozzles accordingly to ensure that they are aligned correctly.
Ink density calibration is also crucial. This process involves adjusting the amount of ink that each nozzle ejects. The printer will print test swatches with different ink densities, and you will need to compare these swatches to a reference standard (usually provided by the printer manufacturer). Based on your observations, you can adjust the ink density settings in the software to achieve the optimal ink density for your prints.
Color calibration is more complex and often involves using a colorimeter or spectrophotometer. These devices measure the color of the printed test swatches and compare them to the expected color values. The calibration software then uses this data to adjust the color output of the printer, ensuring that colors are consistent and accurate across different print jobs.
Tips for Choosing Maintenance Products
Selecting the Right Cleaning Solution
When it comes to choosing a cleaning solution for your UV printer nozzle, several factors need to be considered. First and foremost, the cleaning solution should be specifically formulated for UV printer nozzles. General – purpose cleaners may not be effective in dissolving the unique UV – curable inks used in these printers and could even damage the nozzles.
Look for cleaning solutions that are pH – balanced. A proper pH level ensures that the solution is strong enough to break down ink residues but gentle enough not to corrode the nozzle materials, which are often made of sensitive materials like piezoelectric ceramics or stainless – steel alloys. Additionally, the cleaning solution should have good wetting properties. This allows it to penetrate deep into the nozzle channels and dislodge stubborn ink particles more effectively.
Popular and reliable brands in the market include Epson’s own cleaning solutions for their UV printers, which are known for their compatibility and effectiveness. Another well – regarded brand is Mutoh’s cleaning fluid, which is designed to work seamlessly with Mutoh UV printers, ensuring optimal nozzle cleaning without causing any harm.
Ink Considerations
The quality of the ink you use has a direct impact on the maintenance requirements of your UV printer nozzle. Always choose high – quality, OEM (Original Equipment Manufacturer) inks. OEM inks are formulated to meet the specific requirements of your printer model, ensuring consistent viscosity, color accuracy, and compatibility with the printer’s components, including the nozzles.
Lower – quality or non – OEM inks may have inconsistent viscosities, which can lead to nozzle clogging. They may also contain impurities that can build up inside the nozzles over time, causing performance issues. For example, some cheap inks may have a higher particle count, which can block the tiny ink – ejection holes in the nozzles.
In terms of brands, well – established names like Canon, HP, and Mimaki offer high – quality UV – curable inks that are trusted by professionals in the printing industry. These inks are not only reliable in terms of print quality but also help in reducing the frequency of nozzle maintenance issues, ultimately saving you time and money in the long run.
Conclusion
In conclusion, maintaining the UV printer nozzle is of utmost importance for any printing operation. From the daily tasks of cleaning the nozzle exterior and checking ink levels to the weekly nozzle tests and ink line flushing, and the monthly deep – maintenance steps like removing and soaking the nozzle and calibrating the printer, each aspect plays a crucial role in keeping the nozzle in top – notch condition.
Choosing the right maintenance products, such as the appropriate cleaning solution and high – quality ink, is equally vital. By following these maintenance guidelines, you can effectively prevent common problems like printing stripes, color deviation, and nozzle clogging. This not only extends the lifespan of the nozzle, reducing the need for costly replacements, but also ensures that the print quality remains consistently high, meeting the demands of even the most discerning clients.
So, whether you are a small – scale printing business owner or a hobbyist printer, make nozzle maintenance a regular and integral part of your printing routine. Your printer nozzle will thank you, and your prints will shine with professional – grade quality, time and time again.